Presentation Graphics: Special Effects
Microsoft PowerPoint
(Office XP/2002)
The following is designed to be used as a tutorial. You can
work through this tutorial using multi-tasking
(i.e. switching back and forth between your web browser and Microsoft PowerPoint),
or you can print this web page and just work in your slide show.
This tutorial will introduce you to special effects and other enhancements
that can be included in your slide show. You should try to DO each of the
processes described here (more than once) and also do a little experimenting
on your own. Contact your instructor if you have any questions.
Before you begin, you will need a PowerPoint slide show with
at least 5 slides. At least one of these slides should use the
bulleted list layout (with at least four bulleted items) and have
at least one graphic.
Transitions
A transition determines the visual effect between slides when
you are running the slide show. The default transition is "cut"
(which means that one slide disappears and the next one immediately
appears ... not too exciting).
Run the slide show now to see this effect...
- Go to the first slide.
- From the "View" menu, choose the "Slide Show" command
(or click on the "Slide Show" button at the lower left corner of
the window ... the 3rd button)
- To move from slide to slide, click the mouse or press the
space bar.
- After the last slide, you will be returned to the normal view. To quit the
slide show early, press the ESC key.
PowerPoint includes over 50 different transitions that may be applied to slides.
When a transition is applied to a slide, it determines the transition to
that slide. For the sake of consistency, it is recommended that you either use
the same transition for all of the slides, or use similar transitions in some
consistent pattern. A different transition for every slide can be very distracting
to the audience.
To apply a transition to one or more slides...
- Go to the slide sorter view (choose "Slide Sorter" from the "View"
menu or click on the"Slide Sorter View" button at the lower left
corner of the window ... the 2nd button). Do it now!
- Note: Actually, you don't have to go to this view. But if you don't, you
must apply this command to each slide individually. From the slide sorter
view, you can select one, several, or all of the slides and apply this characteristic
to all of the selected slides at the same time.
- The transitions options are given in the task pane. You can get to the transitions
task pane one of two ways (try one or both of these options):
- If you are in the slide sorter view, click on the tool bar button that
says "Transition," or
- In the task pane, click on the downward pointing triangle near the top
and select "Slide Transition" from the popup menu (this should
be the last item in the menu).
- Select the slides that are to be given a new transition (try each of
the following options ... when finished, select all of your slides).
- Select one slide by clicking on its thumbnail.
- Select more slides by ctrl-clicking on their thumbnails. ("ctrl-click"
means that you are to hold down the ctrl key while clicking). Note that
a slide can be deselected by ctrl-clicking on its thumbnail again.
- Select all slides by typing Ctrl-A (i.e. hold down the ctrl key and type
the letter A).
- Deselect all slides by clicking on any of the white space around the slides.
- Select a transition (click on its name) from the list in the "Slide
Transition" task pane. When you click on a Transition, you will see its
effect on the slide thumbnails. To see the transition effect again, click
on the "Play" button at the bottom of the task pane.
Other transition settings/options included in the task pane are (experiment
with these) ...
- Speed - Popup menu with three options (fast, medium, slow) that effect
how fast the transition will execute. Most often, fast is used.
- Sound - Allows a sound to be played during the transition. This can
often be more annoying to the audience than effective.
- Advance Slide - Determines whether the next slide will be displayed
when the user clicks the mouse, or after a fixed period of time. This feature
will be discussed in detail in a later tutorial.
Run the slide show again to see the results of the new
transition. Experiment with several different types of transitions.
Built-in Animation Schemes
The same transition settings are normally applied to all of the slides (for
consistency). Animations have to do with how the individual elements of each
slide will be presented. Therefore, animations are applied to each slide individually.
Therefore, if you haven't done so already, return to the normal view and select
a slide with a bulleted list and at least one graphic.
PowerPoint includes several predefined animation schemes that determine how
the elements of a slide will be displayed (primarily the slide title and bulleted
list text boxes). These schemes are selected from the slide design task pane.
Click on the downward triangle near the upper right corner of the task pane
and select "Slide Design - Animation Schemes" from the popup menu
Note: If you are already at the slide design task pane, just click on the
blue words near the top that says "Animation Schemes" (if the words
are not blue, then you are already there).
In the task pane you will see a list of predefined animations. To apply these
animations to the current slide, just click on the scheme's name. Try several
to see what they do. To view the animation again, you can either run the
slide show, or click on the "Play" button at the bottom of the task
pane. It is usually better to run the slide show, because the preview isn't
controlled by the user's mouse clicks that bring up each of the bulleted points.
Custom Animations
In addition to the built-in animations schemes provided by PowerPoint, you
can also define your own animation sequence that can effect any and/or all of
the elements on the page (including text boxes, graphics, sounds, movies, and
other objects).
Go to another slide with a title, bulleted list, and at least one graphic (if
you do not have another slide like this, make one).
Custom animations are defined by using the "Custom Animation" task
pane. To get to this task pane, either ...
- Click on the downward pointing triangle at the upper right corner of the
task pane and select "Custom Animation" from the popup menu, or...
- From the "Slide Show" menu, select the "Custom Animation..."
command.
Each object on your slide can have several animation characteristics, including:
- Entrance - How the object will first be displayed.
- Emphasis - What to do with it once it is displayed. For example:
spin, change the font (if it is a test object), change colors, flash, and
many others. You can apply more than one emphasis characteristic to the object.
- Exit - How the object will leave (note: it does not have to leave).
- Motion Paths - A path that the object will follow on the screen.
Each of these four characteristics can also have up to three attributes (determined
by the popup menus near the top of the custom animation task pane). These attributes
include:
- Start - Determines when the animation event will begin. Three options
include:
- On Click - when the mouse is clicked anywhere on the slide
- With Previous - at the same time as the previous event
- After Previous - at some specified time after the previous event
- Property - A value dependent on the particular animation affect.
- Speed - How fast the affect will be executed (very slow, slow, medium,
fast, or very fast).
Animations for the objects on a slide can be sequenced in any order. As these
effects are defined, they will be listed in the task pane. These animations
can also be reordered using the reorder buttons at the bottom of the task pane.
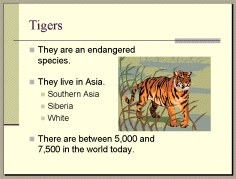 Example:
Create a slide similar to the one at the right. This slide uses the "Title
& Text" layout. Add text to the title area and also to the bulleted
list area. In the bulleted list, create several statements using at least two
levels of points. Finally, add a graphic to the slide. Animate this slide as
follows:
Example:
Create a slide similar to the one at the right. This slide uses the "Title
& Text" layout. Add text to the title area and also to the bulleted
list area. In the bulleted list, create several statements using at least two
levels of points. Finally, add a graphic to the slide. Animate this slide as
follows:
- In the task pane, select "Custom Animation" or select "Custom
Animation..." from the "Slide Show" menu.
- Select (i.e. click once on) the image.
- At the top of the task pane, click on the "Add Effect" button,
select the "Entrance" submenu, and then select one of the options
(note: for more options, select "More Effects..." and make your
selection from the resulting dialog box.
- You can experiment with the three options in the popup menus below the
"Add Effect" button. These well vary depending on which effect
you selected.
- Select (i.e. click once on) the bulleted text area.
- Click on the "Add Effect" button, select the "Entrance"
submenu, and then select one of the options (as before).
Notice that as elements are animated, a list is created in the task pane. Each
item in this list represents an animation specification. You can create as many
animation specifications as you have objects on a slide.
The examples above determine how the items will appear (i.e. make their entrance),
but ...
- you can make them do various things once displayed (select the item, click
the "Add Effect" button, and then use the "Emphasis" submenu)
- you can make them disappear (select the item, click the "Add Effect"
button, and then use the "Exit" submenu)
- you can make them move along a path (select the item, click the "Add
Effect" button, and then use the "Motion Paths" submenu).
Experiment with these options!
Run the slide ("Slide Show" button at the bottom of the task pane)
to view its animation. You will notice that when the bulleted lists displays
its points one at a time, the second level points are displayed with the corresponding
first level point. Sometimes this is what is desired, but to display each of
the subpoints individually (i.e. one at a time), proceed as follows:
- Click on the animation specification in the task pane that represents the
entrance of the bulleted list.
- Click on the downward pointing triangle at the right end of this specification.
From the menu that is displayed, select the command "Effect Options..."
- In the resulting dialog box, click on the "Text Animation" tab.
- Select the desired option from the "Group text:" popup menu (in
the above example, since there are two levels of points, you would choose
"By 2nd level paragraphs").
- Run the slide again to view the results.
You will notice that in the "Effect Options..." dialog box, there
are many other options available (actually, these options vary based on the
animation effect you have chosen). Experiment with these options and
discover their affects.
Where to go from here...
If you understand the above concepts, you are ready to go to the next tutorial (Presentation Graphics: Printing
- Handouts, Overheads, & Presenter Notes). After the completion of all
of the tutorials on Presentation Graphics, you will be ready to start working
on the two Presentation Graphics projects.
[an error occurred while processing the directive]